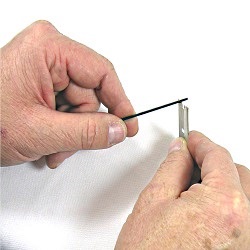
When installing your tip top for a new build or replacing a tip top there are a couple of ways to do this. First way is with a 2-part 5-Min epoxy adhesive and the second method is with hot melt glue; such as Flex Coat Tip Top Adhesive.
When using the epoxy we prefer 5-Min over the slow set. The 5-Min glue is easier to manage and obviously the set up time is quick. The proper way to use the epoxy is after you have mixed the two parts, take the fly top and scoop some glue into the tube of the tip top. This will insure that you have enough glue. Don’t forget to scrape a bit of finish off the blank where the tip top is going to be mounted. Clean up the excess glue with denatured alcohol (the rod builders clean-up buddy) and double check your guide side mark for alignment. We then stand the tip section upright to prevent the tip top from rotating off alignment.

When using the hot melt glue method you have to trim a bit of the adhesive small enough to fit inside the tip top tube before you heat it with a lighter or alcohol lamp. The using pliers hold the tip top near the flame until the glue melts and then put the tip top onto the blank, again making sure you are properly aligned. NEVER get the flame near your blank, it will instantly melt the blank as well! After the excess glue has dried you can simply pop it off with your thumb nail. You can also melt the end of the glue stick and use the tip top to scoop glue into the tube as well, but be quick as the hot melt glue cools quickly.
Replacing tip tops is just as easy. If you have to remove an old top, use the lighter or alcohol lamp to heat the tip top while applying a pulling pressure with your plies. Heat the tip top and not the blank and as soon as the glue has released the pulling pressure will pop the tip off. Clean the old glue off and let everything cool down before adding the new top.
